Parting Hair According to Face Shape

How to Part Your Hair According to Face Shape

Parting your hair according to your face shape can enhance your features and give you a more flattering look. For a round face, a center part can elongate your face while a side part can create the illusion of angles. If you have a square face, a side part can soften your features.

A deep side part can complement a heart-shaped face by accentuating cheekbones. Oval faces can pull off any part, but a center part can create symmetry. Experiment with different parts to find the one that suits you best.

Choosing the right hairstyle that suits your face shape can be a daunting task. However, there are hairstyles that work for almost any face shape. For round faces, long layered cuts or side-swept bangs can add dimension. Square faces can benefit from soft waves or a layered bob. Heart-shaped faces can try out a pixie cut or a chin-length bob.

Oval faces are versatile and can pull off almost any style, but a textured lob or a sleek ponytail can look great. No matter your face shape, there's a hairstyle out there that can make you look and feel your best.

Read More

How To Create Thicker-Looking Roots and Add Dimension to Your Hair
Hair root touchup for thicker roots and dimension

Adding dimension to hair with highlights is a technique used to create depth and movement in the hair. It involves applying lighter or darker shades of color to specific sections of the hair. Here are some tips on how to add dimension to hair with highlights.

To create thicker-looking roots and add dimension to your hair, you can follow these steps for a hair root touch-up:

1. Choose the right shade: Select a root touch-up product that matches your natural hair color or the color of your roots. This will help create a seamless blend and make your roots appear thicker.

2. Prepare your hair: Start by washing and drying your hair as usual. Make sure your hair is completely dry before applying the root touch-up product.

3. Section your hair: Divide your hair into small sections using clips or hair ties. This will make it easier to apply the product evenly and ensure that all roots are covered.

4. Apply the root touch-up product: Follow the instructions provided with the product to apply it to your roots. Typically, you will use a brush or applicator to apply the product directly to the roots. Start from the back of your head and work your way forward.

5. Blend the color: Once the product is applied, gently comb or brush through your hair to blend the color and create a natural-looking finish. This will help create dimension and make your roots appear thicker.

6. Style your hair: Style your hair as desired, using any additional products or tools you normally use. The root touch-up should seamlessly blend with the rest of your hair, creating a thicker and more dimensional look.

Here are a few links to popular root touch-up products that can help you achieve thicker-looking roots and hair dimension:

https://amzn.to/3OyHcpS

https://amzn.to/3YPuDeN

Read More

How to Color Hair with Food Colors Naturally

Hair color ideas - How to Color Hair with Food Colors Naturally
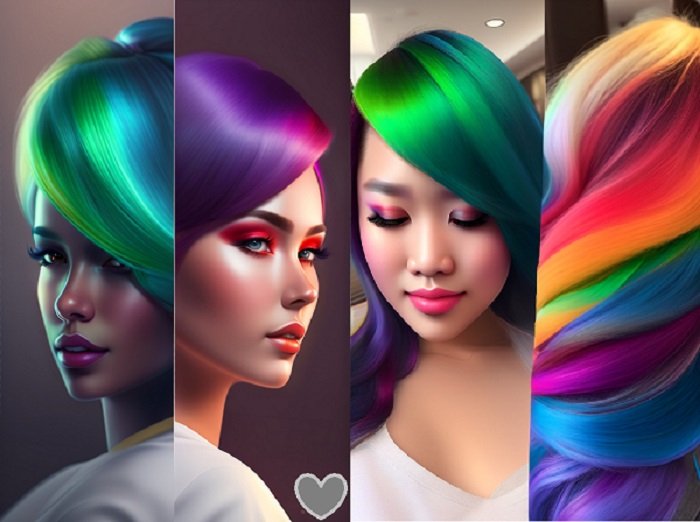
There are so many different products that can create colorful striking brightness to your hair. If you're looking for a natural and temporary way to add some vibrant colors to your hair without the use of harsh chemicals, using food colors can be a great option. Not only are food colors safe to use on your hair, but they also offer a wide range of shades to choose from. Here's a simple guide on how to color your hair with food colors naturally.

Firstly, gather the necessary materials. You will need food coloring in your desired shades, a mixing bowl, a brush or applicator, and some hair conditioner. It's important to note that the color outcome may vary depending on your natural hair color, so it's recommended to do a strand test beforehand.

To begin, mix a few drops of food coloring with a small amount of hair conditioner in the mixing bowl. The amount of food coloring you use will depend on the intensity of color you desire. Remember, a little goes a long way, so start with a small amount and gradually add more if needed.

Once you have your desired color mixture, apply it to your hair using a brush or applicator. Make sure to evenly distribute the color throughout your hair, focusing on the areas you want to highlight. If you want a more subtle effect, you can also create streaks or ombre effects by applying the color to specific sections of your hair.

After applying the color, let it sit for about 30 minutes to an hour. This will allow the color to penetrate your hair and develop. Keep in mind that the longer you leave the color on, the more vibrant the result will be. However, be cautious not to leave it on for too long, as food coloring can potentially stain your hair if left for extended periods.

Once the desired time has passed, rinse your hair thoroughly with warm water until the water runs clear. Avoid using shampoo during this step, as it may strip away the color. After rinsing, you can apply a small amount of conditioner to keep your hair nourished and hydrated.

Finally, style your hair as desired and enjoy your newly colored locks! It's important to note that food coloring is not a permanent hair dye and will gradually fade with each wash. However, this natural method allows you to experiment with different colors without the commitment of a permanent dye.

In conclusion, coloring your hair with food colors can be a fun and safe way to add a pop of color to your look. By following these simple steps, you can achieve vibrant and temporary results that are sure to turn heads. So go ahead, unleash your creativity, and have fun experimenting with different shades!

If you don’t use food color a good product might be the Keratin infused Formula which is Cruelty-free with 20 Colors - and can Color-Refresh and Tone Your Hair with Kind ingredients for All hair types.

Read More

Free Easy Steps for Healthy Hair

Get Healthy Hair

For some people healthy hair comes easy, for others it’s an ongoing struggle. Hair isn’t everything you say, but that depends on the person. I almost shaved off all my hair when transitioning back to my natural hair color which was turning grey at the time.

For me, it was about going back to my natural hair and stopping all the toxins and chemicals that I was coloring my hair with. I couldn’t wait for the new hair growth to grow and wanted to cut away the fake color….my family said don’t go overboard, don’t shave it!

I decided to go cold turkey and just let it grow out, it looked bad with the half grey and half brown hair although I could vision something extraordinary at the end of this path…yes, mother nature was right! The end result which was my true hair color was perfect!

The most important thing about letting your Natural Hair grow back is your health, your Scalp and Hair will be healthier and you won’t have those chemicals and toxins on and In your head and body!

A healthy scalp means healthy hair. A few Free Easy Steps for Healthy Hair for you to keep your strands their healthiest.

1) Massage your scalp every day, once or twice a day, preferably in the morning and again at night for 2-3 minutes each time and use an a few drops of an oil scalp massage for 20 minutes before shampooing your hair.

2) Use non-toxic natural shampoo and conditioners only. Try to rotate and use 3-5 shampoos.

3) Use filtered or distilled water for your final hair rinse.

4) Clarify your hair once a month with apple cider vinegar or something healthy.

5) Eat enough protein, biotin, zinc foods and supplement with vitamins if needed.

6) Protect your hair from the Sun with uv hair protectors.

7) Stop using any form of Hot Tools or use 1-2 times a week with a heat protectant on the lowest setting you can, it’s best not to go over 300F.

Read More